'I shall not see you again, Allardyce ...'
Rear Admiral Sir Christopher Cradock to Sir William Allardyce, Govoner of the Falkland Islands, On his departure to search for von Spee, October 1914.
After sailing from the Falklands,
Rear Admiral Sir Christopher Cradock rounded the Horn with HMS Good Hope (flag), HMS Monmouth, HMS Glasgow and the Armed Merchant Cruiser Otranto. Cradock had cabled the Admiralty on 22nd October 1914 that he was going to round Cape Horn in search of Vice-Admiral Maximilian von Spee's German East Asia Squadron.
 |
| The East Asia Squadron (and Chilean cruisers in the foreground) leaving Valparaiso harbour in Chile, |
In the hunt for von Spee, Cradock had been lured north along the Chilean coast after HMS Glasgow picked up signals from SMS Leipzig indicating she was operating nearby. Von Spee capitalised on this by ordering all signals from his squadron to be prefixed with the Leipzig's call sign. Cradock was keen for a fight and, as night fell on 31 October, ordered Glasgow to meet him 80 km west of the port of Coronel at noon the next day.
On the morning of 1st November, Cradock's squadron was steaming north. The dawn had seen rising seas, scudding clouds and a strengthening breeze from the south-east. HMS Canopus had signalled that she was was 500 km to the south and steaming to meet them. As the day wore on, the seas grew heavier with 3 to 5 metre waved and nearly gale force winds of 30 knots.
 |
| HMS Canopus (in her heyday) off Gibraltar by Charles Dixon (1901) |
Leipzig and Glasgow spotted each other at almost simultaneously at 16:17. Both called their crews to action stations and moved to engage. It was only a matter of minutes before the masthead lookout on the Glasgow spotted more smoke and realised they had found the entire East Asia Squadron!
The Glasgow signalled the news to Cradock and turned back to the south-west to join the rest of the squadron. Craddock ordered his ships to form up in line astern behind him and set a southerly course almost parallel to von Spee. As the sun sunk in the west, Cradock gambled on the dazzling effect of the sunset behind him to give him some advantage over the German gun layers.
 |
| SMS Scharnhorst at Coronel |
Sunset was at 19:00. At 19:05, von Spee's ships opened fire with deadly effect. The fate of Cradock's South Atlantic Squadron was soon sealed. Good Hope and Monmouth were sunk with all hands – 1,600 British officers and men were dead with Cradock among them – Glasgow and Otranto both escaped.
 |
| HMS Good Hope (Cradock's flagship) on fire at the action at Coronel, 1 November 1914, by W.L. Wyllie |
Of Cradock's circumstances, Sir Julian S Corbett wrote:
It is not without emotion that one contemplates the feelings of so fine an officer when suddenly he found himself face to face with the hopeless situation into which, against all his protests and better judgment, he clearly believed himself to have been forced. A cloud that can never be lifted has fallen on one of the most tragic moments in our Naval history. All we can ever know is the silver lining.
HISTORY OF THE GREAT WAR - NAVAL OPERATIONS, Volume 1, to the Battle of the Falklands, December 1914 (1920) by Sir Julian S Corbett, Accessible at: http://www.naval-history.net/WW1Book-RN1b.htm#25
To commemorate the 100th anniversary of this tragic encounter in the south-west Pacific in the opening months of the Great War, I dusted off my 1:2400
Panzerschiffe ships and played the Battle of Coronel scenario provided with
Grand Fleets II naval rules.
 |
| Purnell's History of the First World War (c. 1970) - possibly the first place I read of the action at Coronel! |
Historically, Cradock, on sighting von Spee's squadron, brought his ships about to cruise in line astern parallel to the enemy – the two lines of ships steaming south separated by 16,500 metres of rolling seas. Cradock's plan was to use the setting sun to his advantage – dazzling the German gun layers.
However, in this scenario, Cradock ordered his squadron to reform from line abreast to line ahead, and steered them a few points off their northerly heading towards von Spee to make a pass on the seaward side of the German line of battle.
 |
| 16:45, 1 November 1914, von Spee's East Asiatic Squadron (sailing south, bottom left) is sighted by Cradock (heading north, top right) in heavy seas off the port of Coronel on the Chilean coast (off to the left of the picture). |
 |
| Vice-Admiral Graf Maximilian von Spee's East Asiatic Squadron - the armoured cruisers SMS Scharnhorst and SMS Gneisenau and the light cruisers SMS Dresden and SMS Leipzig (sailing backwards in this picture to taunt the British!) |
 |
| Rear-Admiral Sir Christopher Cradock's South Atlantic Squadron - at Coronel he had the armoured cruisers HMS Good Hope (Cradock's flagship), and HMS Monmouth, the light cruiser HMS Glasgow and a converted liner—HMS Otranto. |
Just on sunset (below), the two squadrons in line of battle pass each other at medium range. Von Spee orders Scharnhorst and Gneisenau to direct the first salvos of the engagement towards HMS Glasgow, the lead British ship. German gunnery is intense, and accurate with three hits on Glasgow by Scharnhorst, knocking out a main 6" gun and two secondary 4" guns. HMS Glasgow's salvo causes only minor damage to Scharnhorst.
As the light begins to fade (below), von Spee orders all this ships to engage the British line - Glasgow (lead ship, bottom left of picture), Monmouth and Good Hope (at the rear). The setting sun outlined the British allowing the German fire controllers to send in several deadly salvos.
- Dresden and Leipzig achieve two hits on the Glasgow knocking out two 4" guns.
- Monmouth takes three hits from Gneisenau – one critical and causing a major fire – the other two knock out two 6" guns.
- Good Hope takes two hits from Scharnhorst knocking out two guns.
- The thin-skinned liner Otranto shelters further out to sea behind the British line of battle.
Cradock orders his ships to return fire, but in the rolling seas, the British gunnery is mostly ineffective although a critical hit by Monmouth causes a fire on Gneisenau.
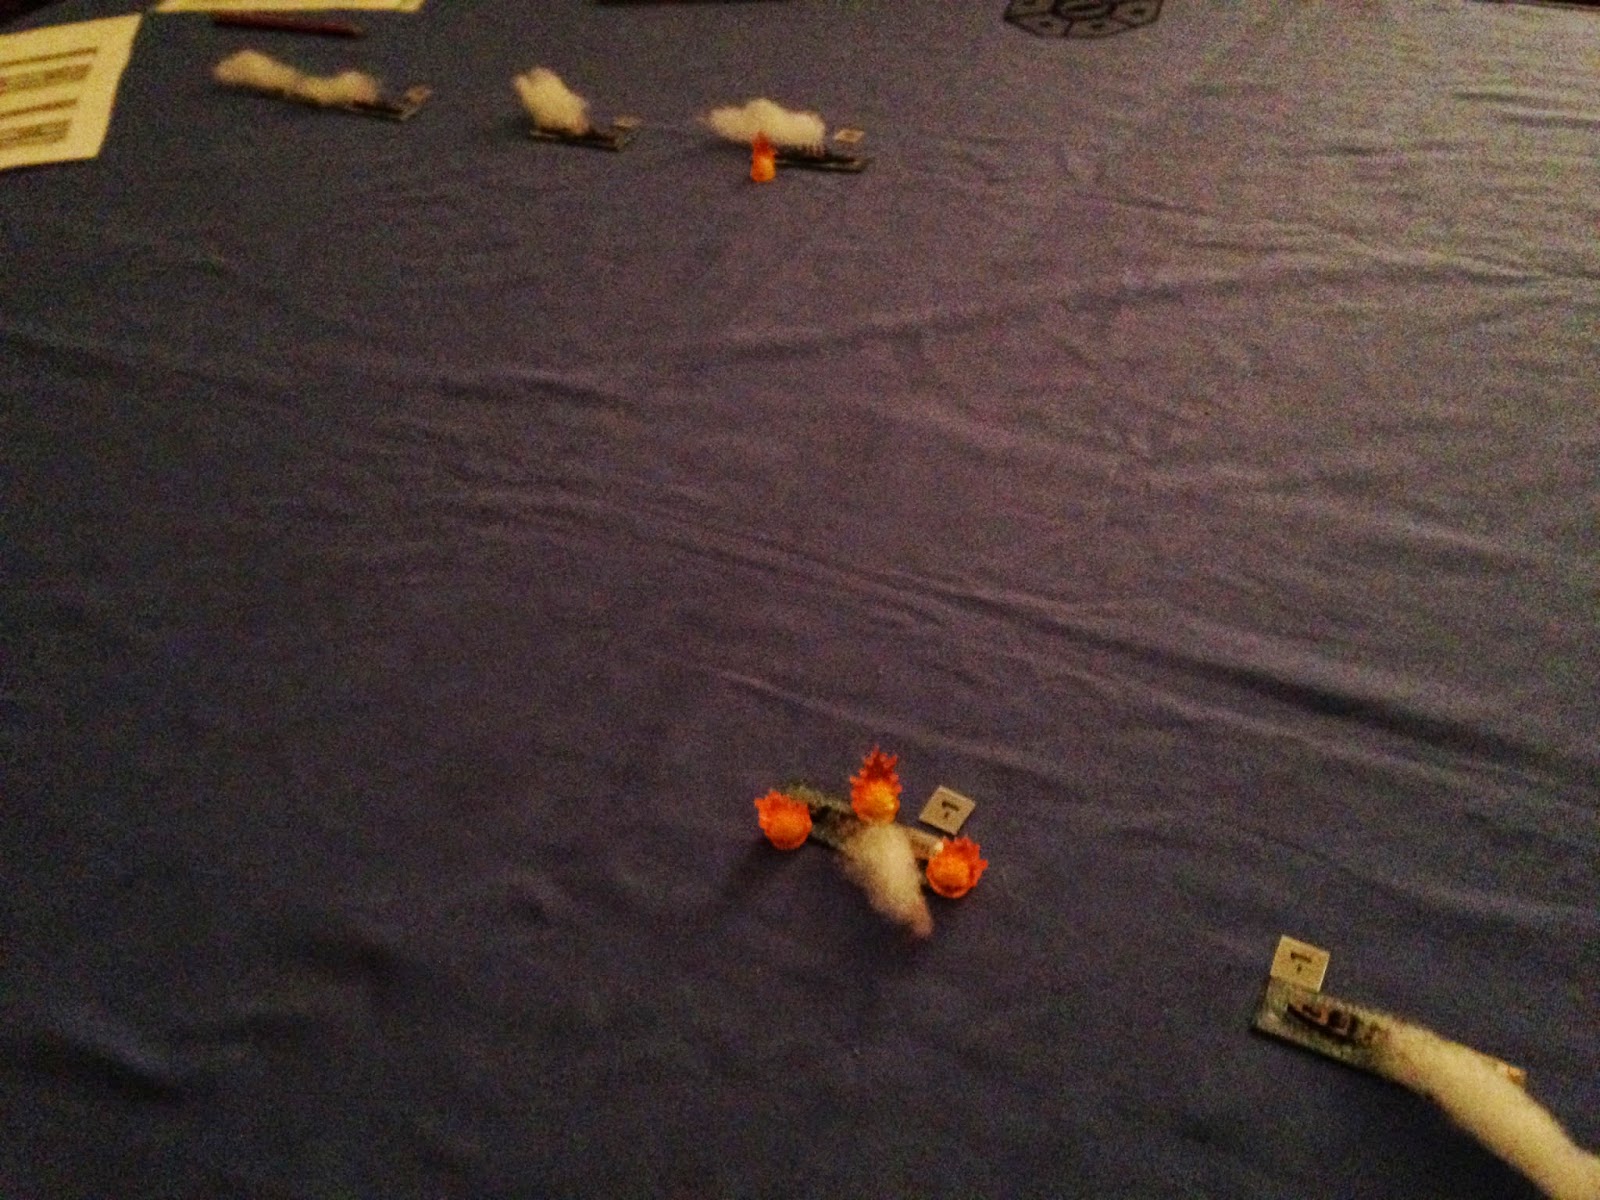
As darkness falls (below), von Spee orders his squadron to come about and pick off the battered and disordered British line. Glasgow had already limped out to sea critically damaged. As Gneisenau, Leipzig and Dresden (top right of picture, L to R) close in and train their guns on the burning British ships, Scharnhorst (bottom centre) swings in a wide arc hoping to cut off any route of escape for Good Hope (centre) and Monmouth (upper left).
- Gneisenau lands two final hits on the Monmouth – she is crippled with no armaments intact.
- In the gloom Good Hope's gunners pick out the Scharnhorst and unleash a furious salvo with five hits hammering the German Flag – the Bridge receives a direct hit, major flooding is caused but is contained with a quick reaction by the damage crews.
- Leipzig responds to the last stand of the Good Hope, knocking out the Flag's fire control and the two remaining 6" guns to starboard.
- Dresden's gunners find the lumbering bulk of the Otranto in the darkness and four hits find their mark causing significant structural damage and knocking out two 4.7" guns to starboard.
In the darkness, Cradock's mortally wounded squadron limps out to sea as the crews attempt to douse fires and stem any flooding. Casualties are heavy, but the knowledge that von Spee's squadron still hunts in the darkness means that all available attention must be given to reforming and (hopefully) slipping away under cover of night.
Cradock's thoughts turn to how he might get past von Spee in the night and, hopefully, make harbour at Coronel in the morning. One might also pass a thought for HMS Caonopus, over 500 km (300 nautical miles) to the south of their current position, how Cradock could have used her 12" guns that evening!
 |
| Actually, this is damage to the deck of HMS Chester sustained during the battle of Jutland – one can only imagine the challenge of making repairs on ships damaged in actions far from their home port. |
For the Germans, much depended on what damage the shells of the HMS Good Hope had wreaked on the bridge of the Scharnhorst in the last minutes of the engagement – was von Spee wounded? Was he dead? Would the east Asiatic Squadron press on after Cradock or slip away south and round the Horn? Theirs was a tactical victory at the very least – but safe harbour at Wilhelmshaven was literally half a world away!