Monday, 10 November 2014

Coronel, 1 November 1914

'I shall not see you again, Allardyce ...'
Rear Admiral Sir Christopher Cradock to Sir William Allardyce, Govoner of the Falkland Islands, On his departure to search for von Spee, October 1914.

After sailing from the Falklands, Rear Admiral Sir Christopher Cradock rounded the Horn with HMS Good Hope (flag), HMS Monmouth, HMS Glasgow and the Armed Merchant Cruiser Otranto. Cradock had cabled the Admiralty on 22nd October 1914 that he was going to round Cape Horn in search of Vice-Admiral Maximilian von Spee's German East Asia Squadron.
The East Asia Squadron (and Chilean cruisers in the foreground) leaving Valparaiso harbour in Chile,  
In the hunt for von Spee, Cradock had been lured north along the Chilean coast after HMS Glasgow picked up signals from SMS Leipzig indicating she was operating nearby. Von Spee capitalised on this by ordering all signals from his squadron to be prefixed with the Leipzig's call sign. Cradock was keen for a fight and, as night fell on 31 October, ordered Glasgow to meet him 80 km west of the port of Coronel at noon the next day.

On the morning of  1st November, Cradock's squadron was steaming north. The dawn had seen rising seas, scudding clouds and a strengthening breeze from the south-east. HMS Canopus had signalled that she was was 500 km to the south and steaming to meet them. As the day wore on, the seas grew heavier with 3 to 5 metre waved and nearly gale force winds of 30 knots.
HMS Canopus (in her heyday) off Gibraltar by Charles Dixon (1901)
Leipzig and Glasgow spotted each other at almost simultaneously at 16:17. Both called their crews to action stations and moved to engage. It was only a matter of minutes before the masthead lookout on the Glasgow spotted more smoke and realised they had found the entire East Asia Squadron!

The Glasgow signalled the news to Cradock and turned back to the south-west to join the rest of the squadron. Craddock ordered his ships to form up in line astern behind him and set a southerly course almost parallel to von Spee. As the sun sunk in the west, Cradock gambled on the dazzling effect of the sunset behind him to give him some advantage over the German gun layers.
SMS Scharnhorst at Coronel
Sunset was at 19:00. At 19:05, von Spee's ships opened fire with deadly effect. The fate of Cradock's South Atlantic Squadron was soon sealed. Good Hope and Monmouth were sunk with all hands – 1,600 British officers and men were dead with Cradock among them – Glasgow and Otranto both escaped.
HMS Good Hope (Cradock's flagship) on fire at the action at Coronel, 1 November 1914, by W.L. Wyllie
Of Cradock's circumstances, Sir Julian S Corbett wrote:
It is not without emotion that one contemplates the feelings of so fine an officer when suddenly he found himself face to face with the hopeless situation into which, against all his protests and better judgment, he clearly believed himself to have been forced. A cloud that can never be lifted has fallen on one of the most tragic moments in our Naval history. All we can ever know is the silver lining.
HISTORY OF THE GREAT WAR - NAVAL OPERATIONS, Volume 1, to the Battle of the Falklands, December 1914 (1920) by Sir Julian S Corbett, Accessible at:  http://www.naval-history.net/WW1Book-RN1b.htm#25


To commemorate the 100th anniversary of this tragic encounter in the south-west Pacific in the opening months of the Great War, I dusted off my 1:2400 Panzerschiffe ships and played the Battle of Coronel scenario provided with Grand Fleets II naval rules.
Purnell's History of the First World War (c. 1970) - possibly the first place I read of the action at Coronel! 
Historically, Cradock, on sighting von Spee's squadron, brought his ships about to cruise in line astern parallel to the enemy – the two lines of ships steaming south separated by 16,500 metres of rolling seas. Cradock's plan was to use the setting sun to his advantage – dazzling the German gun layers.

However, in this scenario, Cradock ordered his squadron to reform from line abreast to line ahead, and steered them a few points off their northerly heading towards von Spee to make a pass on the seaward side of the German line of battle.
16:45, 1 November 1914, von Spee's East Asiatic Squadron (sailing south, bottom left) is sighted by Cradock (heading north, top right) in heavy seas off the port of Coronel on the Chilean coast (off to the left of the picture).
Vice-Admiral Graf Maximilian von Spee's East Asiatic Squadron - the armoured cruisers SMS Scharnhorst and SMS Gneisenau and the light cruisers SMS Dresden and SMS Leipzig (sailing backwards in this picture to taunt the British!) 
Rear-Admiral Sir Christopher Cradock's South Atlantic Squadron - at Coronel he had the armoured cruisers HMS Good Hope (Cradock's flagship), and HMS Monmouth, the light cruiser HMS Glasgow and a converted liner—HMS Otranto.
Just on sunset (below), the two squadrons in line of battle pass each other at medium range. Von Spee orders Scharnhorst and Gneisenau to direct the first salvos of the engagement towards HMS Glasgow, the lead British ship. German gunnery is intense, and accurate with three hits on Glasgow by Scharnhorst, knocking out a main 6" gun and two secondary 4" guns. HMS Glasgow's salvo causes only minor damage to Scharnhorst.
As the light begins to fade (below), von Spee orders all this ships to engage the British line - Glasgow (lead ship, bottom left of picture), Monmouth and Good Hope (at the rear). The setting sun outlined the British allowing the German fire controllers to send in several deadly salvos. 
  • Dresden and Leipzig achieve two hits on the Glasgow knocking out two 4" guns. 
  • Monmouth takes three hits from Gneisenau – one critical and causing a major fire – the other two knock out two 6" guns. 
  • Good Hope takes two hits from Scharnhorst knocking out two guns. 
  • The thin-skinned liner Otranto shelters further out to sea behind the British line of battle. 
Cradock orders his ships to return fire, but in the rolling seas, the British gunnery is mostly ineffective although a critical hit by Monmouth causes a fire on Gneisenau.
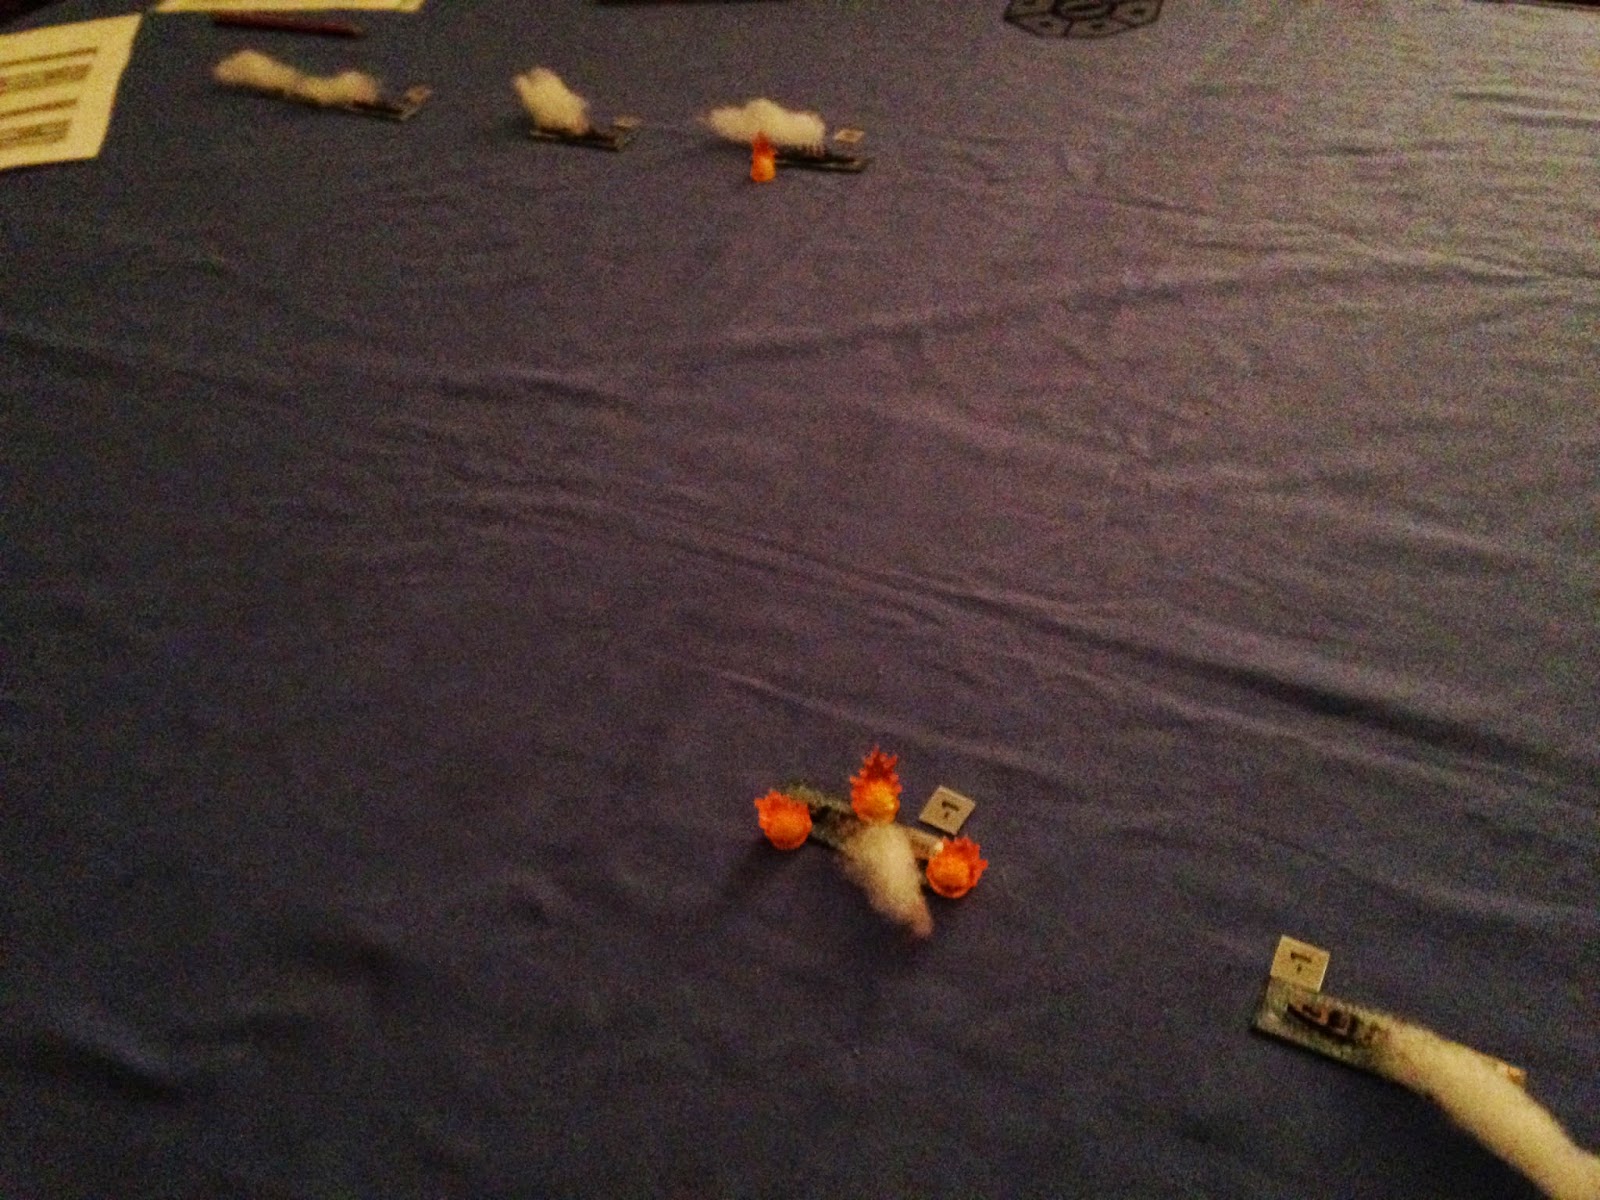
As darkness falls (below), von Spee orders his squadron to come about and pick off the battered and disordered British line. Glasgow had already limped out to sea critically damaged. As Gneisenau, Leipzig and Dresden (top right of picture, L to R) close in and train their guns on the burning British ships, Scharnhorst (bottom centre) swings in a wide arc hoping to cut off any route of escape for Good Hope (centre) and Monmouth (upper left).
  • Gneisenau lands two final hits on the Monmouth – she is crippled with no armaments intact.
  • In the gloom Good Hope's gunners pick out the Scharnhorst and unleash a furious salvo with five hits hammering the German Flag – the Bridge receives a direct hit, major flooding is caused but is contained with a quick reaction by the damage crews.
  • Leipzig responds to the last stand of the Good Hope, knocking out the Flag's fire control and the two remaining 6" guns to starboard. 
  • Dresden's gunners find the lumbering bulk of the Otranto in the darkness and four hits find their mark causing significant structural damage and knocking out two 4.7" guns to starboard.
In the darkness, Cradock's mortally wounded squadron limps out to sea as the crews attempt to douse fires and stem any flooding. Casualties are heavy, but the knowledge that von Spee's squadron still hunts in the darkness means that all available attention must be given to reforming and (hopefully) slipping away under cover of night.

Cradock's thoughts turn to how he might get past von Spee in the night and, hopefully, make harbour at Coronel in the morning. One might also pass a thought for HMS Caonopus, over 500 km (300 nautical miles) to the south of their current position, how Cradock could have used her 12" guns that evening!
Actually, this is damage to the deck of HMS Chester sustained during the battle of Jutland – one can only imagine the challenge of making repairs on ships damaged in actions far from their home port. 
For the Germans, much depended on what damage the shells of the HMS Good Hope had wreaked on the bridge of the Scharnhorst in the last minutes of the engagement – was von Spee wounded? Was he dead? Would the east Asiatic Squadron press on after Cradock or slip away south and round the Horn? Theirs was a tactical victory at the very least – but safe harbour at Wilhelmshaven was literally half a world away!

Saturday, 1 November 2014

Albany Anzac convoy centenary

I would have liked to be in Albany (WA) for the centenary of the departure of the first convoy of ANZAC troops to fight in WWI . The convoy had it's last call in Australian waters at Albany in Western Australia, departing on November 1, 1914.

26 Australian and 10 New Zealand troop carriers departed from King George Sound escorted by the HMAS Sydney, HMAS Melbourne and HMS Minotaur.

The Rugby legend, Tom 'Rusty' Richards - who had enlisted in the 1st Field Ambulance in the early days of the way, had this to say of the departure:

November 1st, 1914
It was a mighty solemn procession. Thirty-five transports and a convoy all running in single file, and not a murmur, not a gunshot or whistle. No, not even a bugle call.
Source

The convoy was joined two days later by the Japanese ship HIJMS Ibuki and transport ships HMAT Ascanius and HMAT Medic.

HMAS Sydney, was to leave the convoy on 9th November to hunt the notorious german raider, SMS Emden.

The ANZAC troops landed on the beaches of Gallipoli, Turkey on 25 April, 1915.

Many more were to follow.

In 1916, at 34 years of age, my maternal Grandfather, Harry Sennet was to follow in the footsteps of these early Diggers. Boarding a train in Ballarat (Victoria) in the early hours of the the morning they travelled to Port Melbourne and boarded HMAT Ascanius, bound for England, and ultimately, the Western Front.

Saturday, May 27th, 1916.
By the time we cleared the Heads [Port Philip Bay] and had our last view of Australia, I felt that I had  left behind me everything that had made life worthwhile.
Diary of Henry J Sennet, 991

Saturday, 25 October 2014

Trommelfeuer!

Among the many postcards my grandfather brought back from the Great War, was the humorous German postcard - Trommelfeuer (trans. barrage, or more correctly, 'drumfire'). This was printed by Gerhard Stalling Publishers in Oldenburg in Lower Saxony.
This depicts just the sort of 'barrage' all soldiers much have dreamt of once they returned to the front!
Here's the reverse side. One can't help but wonder where it was purchased and by whom - and why it never was written on or posted.

You can see more of these postcards from this and other wartime publishers in Germany here: http://www.zeno.org/Bildpostkarten/M/Erster+Weltkrieg/Humor

Since I on on the topic of barrages, this weekend saw more GWSH II preparations (after a long pause) which have been focussing on German artillery which are the Corps/Divisional 'assets' for IX Corps (17th and 18th Infantry Divisions):
Thanks to the Landships II website for the details. A very useful resource - well worth a look.

Here's a few pictures. I'm quite happy how they turned out although I needed to build the sides of the base up more as the guns and the limbers are sitting at quite an angle.


Irregular Miniatures GWG23 7.7 cm field gun. 4 Regiments per division.

German 15cm howitzers (Irregular Miniatures) - 2 regiments (of 2 batteries each) attached at Corps level

Thursday, 23 October 2014

The Swan of the East (I)

I have been kitting up for some naval gaming in the Pacific and Southern Atlantic theatres.  In historical terms this will include von Spee's dash across the Pacific and the engagements at Coronel (1 November 1914) and the Falklands (8 December 1914).

But first its my old favourite – the Battle of Cocos. HMS Sydney vs. SMS Emden. 9th November is not far away, but this will be one commemoration I'm ready for!

Planned layout of the HMAS Sydney vs SMS Emden clash at Cocos Islands

HMS Sydney sights the smoke trail from the Emden

HMAS Sydney is spotted - Müller order a full head of steam and the SMS Emden leaves it's shore party behind and makes of open water.

Sydney closing to a distance of 9,500 yards (8,700 m)where they set a parallel course to the Emden and open fire to deadly effect. 

North Keeling Island - the final resting place of the Emden


German 18th Division - Battle of the Frontiers

The clock seems to have stopped ticking on the 1st of August 1914, here.

Despite a good, solid start to this project, German mobilisation has languished for a couple of months – family, work and a return to study have more than filled my waking hours.

However, I'm pleased to report some progress. In a flurry of recent activity two regiments of the German 18th Division have rolled into the marshalling area.


Alas, just some quick iPhone shots ...

I'm onto artillery next, have a bit of a break from the infantry.

One of the benefits of a return to study at my old university is I get to visit a great antiquarian bookshop that was once a regular haunt of mine - Bradstreet's Books.

I managed to pick up an interesting title: John Laffin, Panorama of the Western Front.

From Amazon:
In 1916 the French illustrator Georges Malfroy decided to produce a series of panoramic views of the entire western front from the english channel to the Swiss border. It was designed to give people an idea of where their children/loved ones were fighting and so they could make sense of the names mentioned in newspapers. He put together his illustrations from topographical survey maps, ariel photos and extensive personal travels to different areas of the front
(http://www.amazon.com/Panorama-Western-Front-John-Laffin/dp/1856279014)

Not a bad little volume - I know there is a collection of ariel photographs of the Western Front been published recently, just out of my price range at the moment. I

Sunday, 10 August 2014

The personal side of this journey

The centenary of the Great War has been significant to me on a number of fronts, but none more than the personal side. My early experiences of the conflict were tales of my grandfather, Harry Sennett (who died a few years before I was born). I always knew Harry was an artist – having grown up with his painting on our walls. He was trained by Frederick McCubbin at the National Gallery School, in Melbourne Australia – schooling paid for by his benevolent step father, John Sennett.
Harry Sennett (seated).
'The Grey Mill', HJ Sennett, 1947. Painted from oil sketches made of everyday life
behind the lines of the Western Front in 1917-18.
But the other side to my grandfather that captured my imagination, was that in 1916, at the grand old age of 34, he enlisted in the Australian Imperial Force and went on to serve on the Western Front in 1917–18. After a stint in the trenches with the 39th infantry Battalion, Harry's cartography and drafting skills came to his rescue and he was transferred to a position as a clerk at 10th Brigade HQ then was subsequently posted to GHQ as one of General Monash's personal clerks.

A grand collection of maps, documents and souvenirs came home with Harry – many of them now at the Australian War Memorial. Some remain with me, fortunately. Although, I remember my mother telling me that in the 1930s he pulled out a kitbag of Pickelhaubes and German forage caps and tossed them on the fire saying 'nobody will ever want to see these'!

I've always heard that Harry kept a diary during the war (indeed, through his while adult life), but they have always been in the (very safe) possession of others. So, they have always presented an unreachable opportunity. Well, today that has changed! I have finally managed to get my hands on the three diaries he kept while on active service.
The three elusive diaries on Harry's kitbag


March 1st to November 17th 1916 – enlistment to leaving England for the Front in France.

December 1916 to the icy fields of Flanders in December 1917. 
1918 diary
Well, as you can imagine, I can hardly wait to get my teeth into these. The plan is to transcribe all three volumes and try and piece together a narrative with help of the official records. I will post some of the more interesting finds among it here.

Saturday, 9 August 2014

German IX Corps musters for Battle of the Frontiers

Having WWI commemorations in full swing has inspired me to keep at the painting table on the Mons project. Today I finished the first batch of German infantry for IX Corps. Irregular miniatures in 6mm – as per the BEF – with five figures a base (Irregular bases are 3 figures per base).

While the grey uniform certainly differentiates them on the table, I've also changed the basing colour scheme just to make that easy at a glance. I've not found the German infantry as easy to paint as the British troops.

In many of these Irregular sculpts the Pickelhaube is a little indistinct. To try and capture that very early war look, I've gone with painting the regimental number (well, a red dot!) on the Pickelhaube cover in red rather than the green that would be more appropriate for 1915, which I hope to stretch this early war range into.